Despite the apparent simplicity of minimalist motion graphics, there’s an immense amount of complexity in creating their composition and animation. This is my motivation for creating a small series about the Elements of Motion Graphics, a tutorial series dedicated to Blender Motion Graphics.
In this series, we’ll be narrowing our focus to the essentials of artistic composition and the rules of animation. Starting from the simplest geometric shapes, or atoms, we’ll be generating up a few isotopes - small variations on elemental atoms - and many molecules, composed of clever compositions of atoms and their isotopes. From there, we’ll shift our focus on setting up the reaction, by building on the fundamentals of composition to create a pleasing image. Finally, we’ll study kinetics and set everything into motion with important rules for animators.
I figured that the chemical analogy fit this process well, so that’s what we’re going with 😃
Additionally, this will setup a good foundation for future work, as composition is incredibly important in setting up an appealing render, while familiarity with the principles of animation will save you from struggling with animations that just don’t work.
After all, laying out simple motion graphics is a great way to focus on the composition, without being distracted by complex lighting or models.
Video Tutorial
Text Tutorial
This tutorial will go over the first three sections: Atoms, Isotopes, and Molecules, and we’ll cover a few topics, including: - Generating Geometric Primitives with the Add Mesh dialogue | These are Atoms - Simple mesh editing tools, like the Loop Cut, Inset Subdivision Operations | These are Isotopes - Mesh modifiers, utilizing the Boolean and Array modifiers | These are Molecules
Atoms
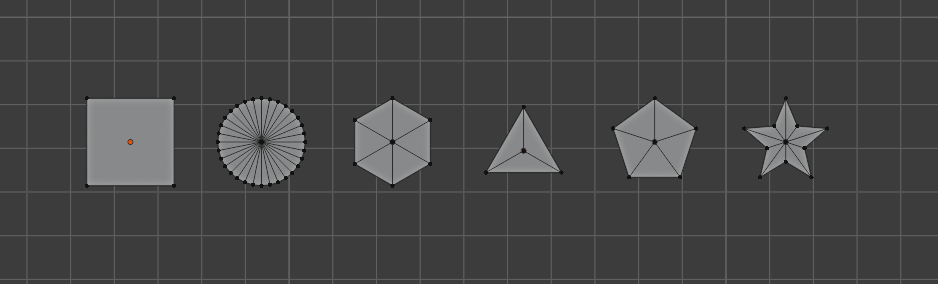
These are six of the most basic shapes to work with: 1. Equilateral Triangle 2. Square (Plane) 3. Pentagon 4. Hexagon 5. Decagon (Star) 6. Circle
Creating them is rather straightforward, and all can be generated with the Shift+A > Mesh dialogue.
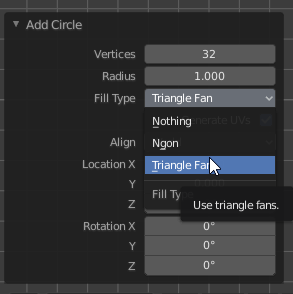
For regular polygons, the Add Circle tool does everything, just adjust the number of sides, and set the fill to Triangle Fan, which will create a central vertex connecting to each of the outer vertices, so that the shape is composed of radial triangular slices. This is helpful if we want to say, cut out half a circle. The NGON (ie. Polygon, with N sides) fill option will not permit this, as it just creates a single face connecting all the outer vertices.
Isotopes
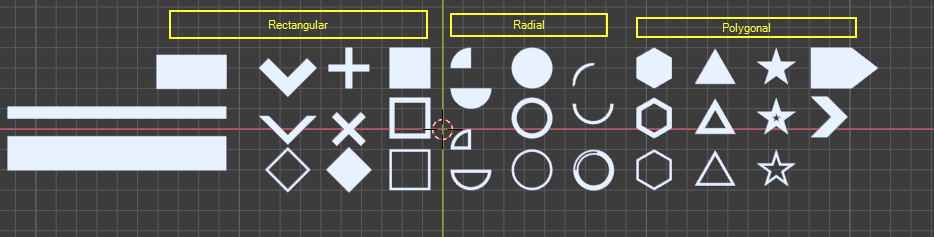 Here’s a general classification of isotopic elements. The rectangular ones typically have hard right angles, while the radial ones are arc segments. The polygonal elements have variable, but nonzero angles between adjacent sides.
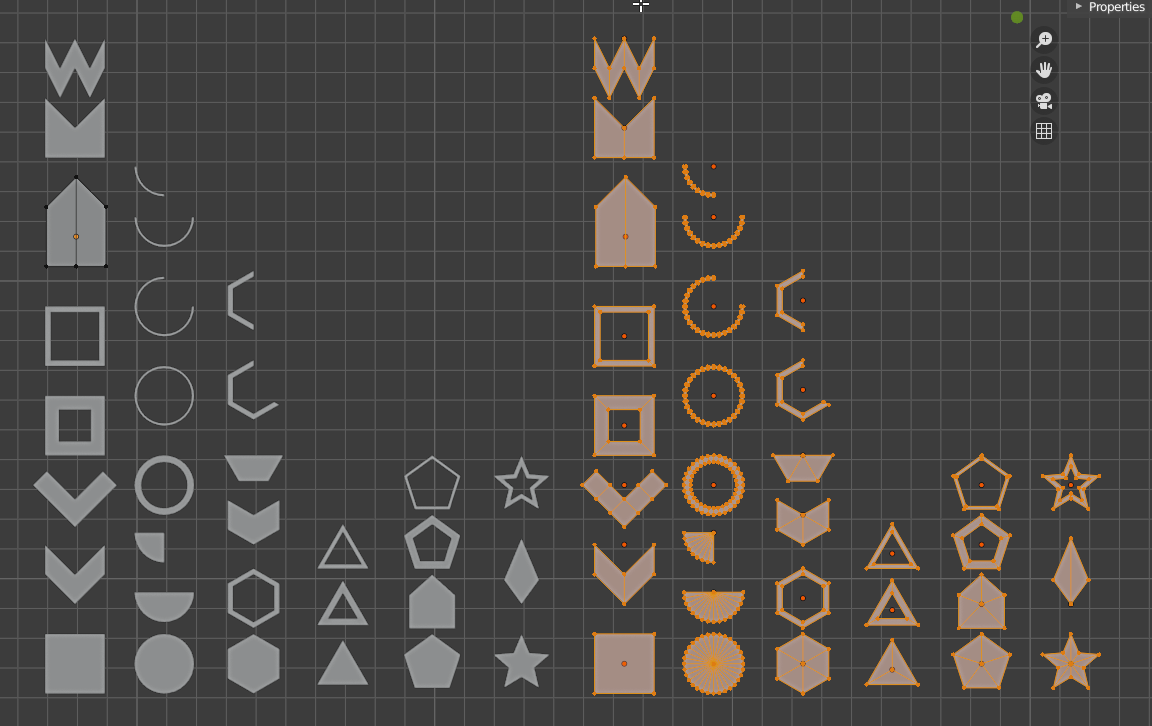 Here is a quick look at their construction, and how they’re derived from their base atoms.
There are a few general techniques here, that I will assume you’re familiar with (if you’re not, follow the video): 1. For chevron/arrow like shapes, you can typically use subractive methods. Simply divide the square plane into nine equal squares via loop cutting (Ctrl+R) or through the subdivide > 2 option (W > Subdivide). Then, delete some of the cells. If you remove any cluster of four squares, you’re left with an arrow shape. If you remove each of the corner square cells, you get a cross, or rotated 45 degrees, an X. 2. To make the banner/bullet shape, simply loop cut once in the middle, and pull one of the vertices in the direction parallel to the loop cut. 3. To make hollow shapes, select the whole shape, and hit I to inset, then delete the inset face. You can scale the inner vertices to alter the thickness as needed. You may also create arc segments by then removing pieces of the remaining outline.
And a note - There are many more variations to be made on the basic isotopes, and it would be instructive to look elsewhere and observe motion graphics on your own to extract out more interesting shapes. This is by no means a comprehensive list! It doesn’t include, for example, arrowhead shapes, trapezoids, parallelograms, rounded bullets, and myriad others.
Molecules
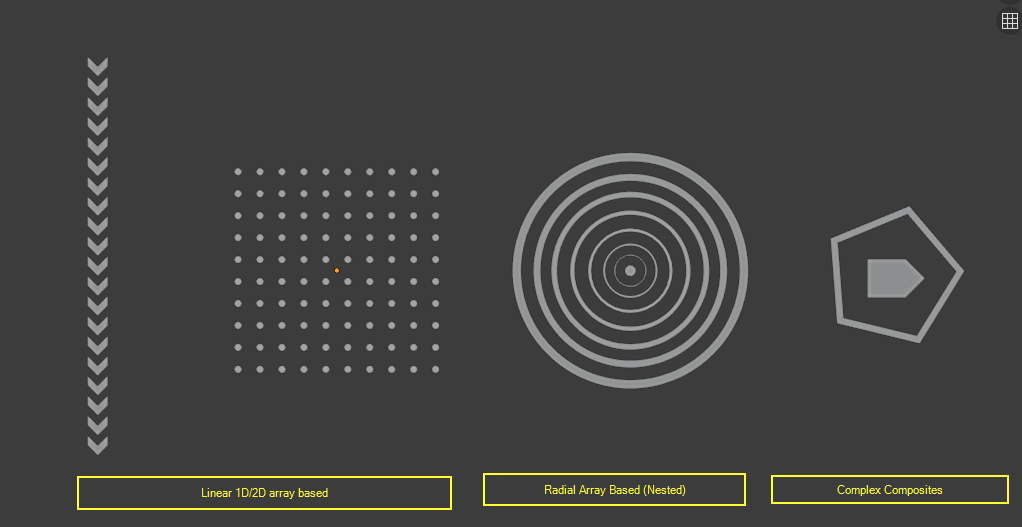
Now, to put together the atoms and isotopes to form polymeric and other molecules, we can generate a multitude of forms, that I’ll classify into three categories:
- Array Based, formed of repeating elements, including dot matrices, square dot matrices, and stripes
- Radial Array Based, formed of nested, or concentric elements
- Other forms, that defy classification
To create array based elements, you can apply an array modifier with relative spacing of greater than 1.
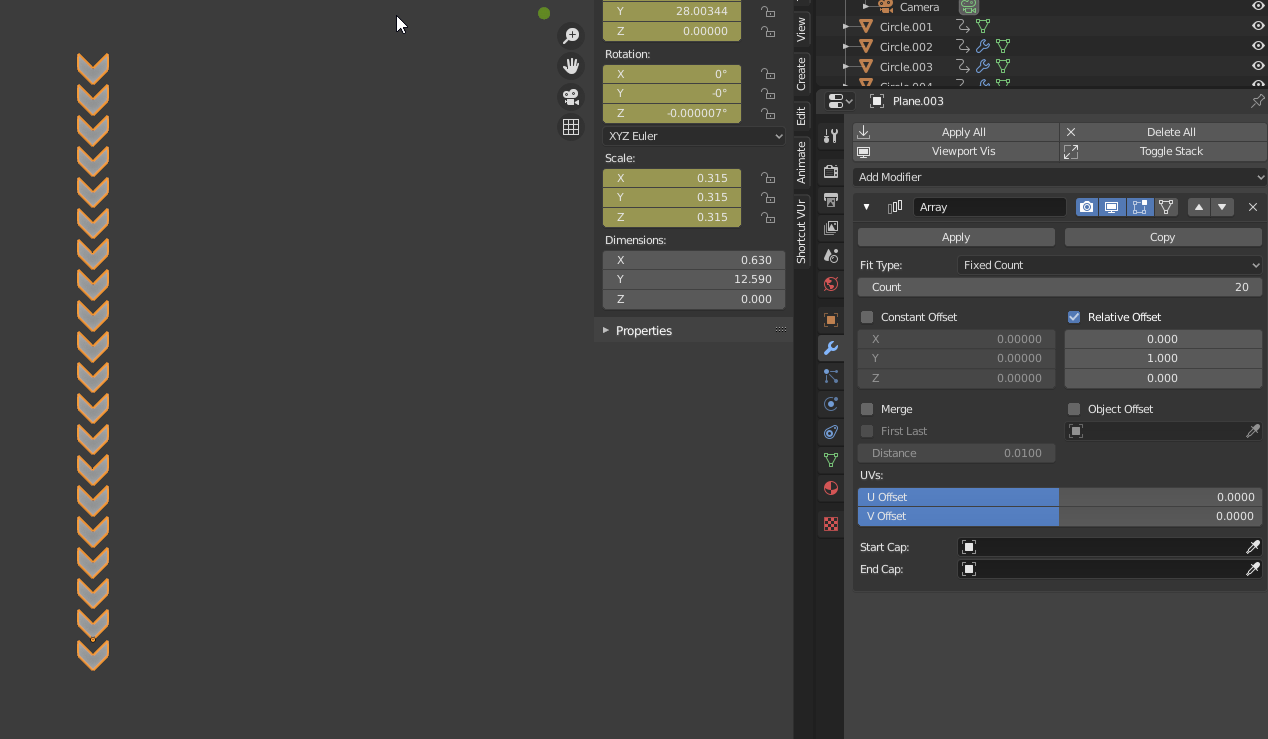 This is a linear array of chevrons.
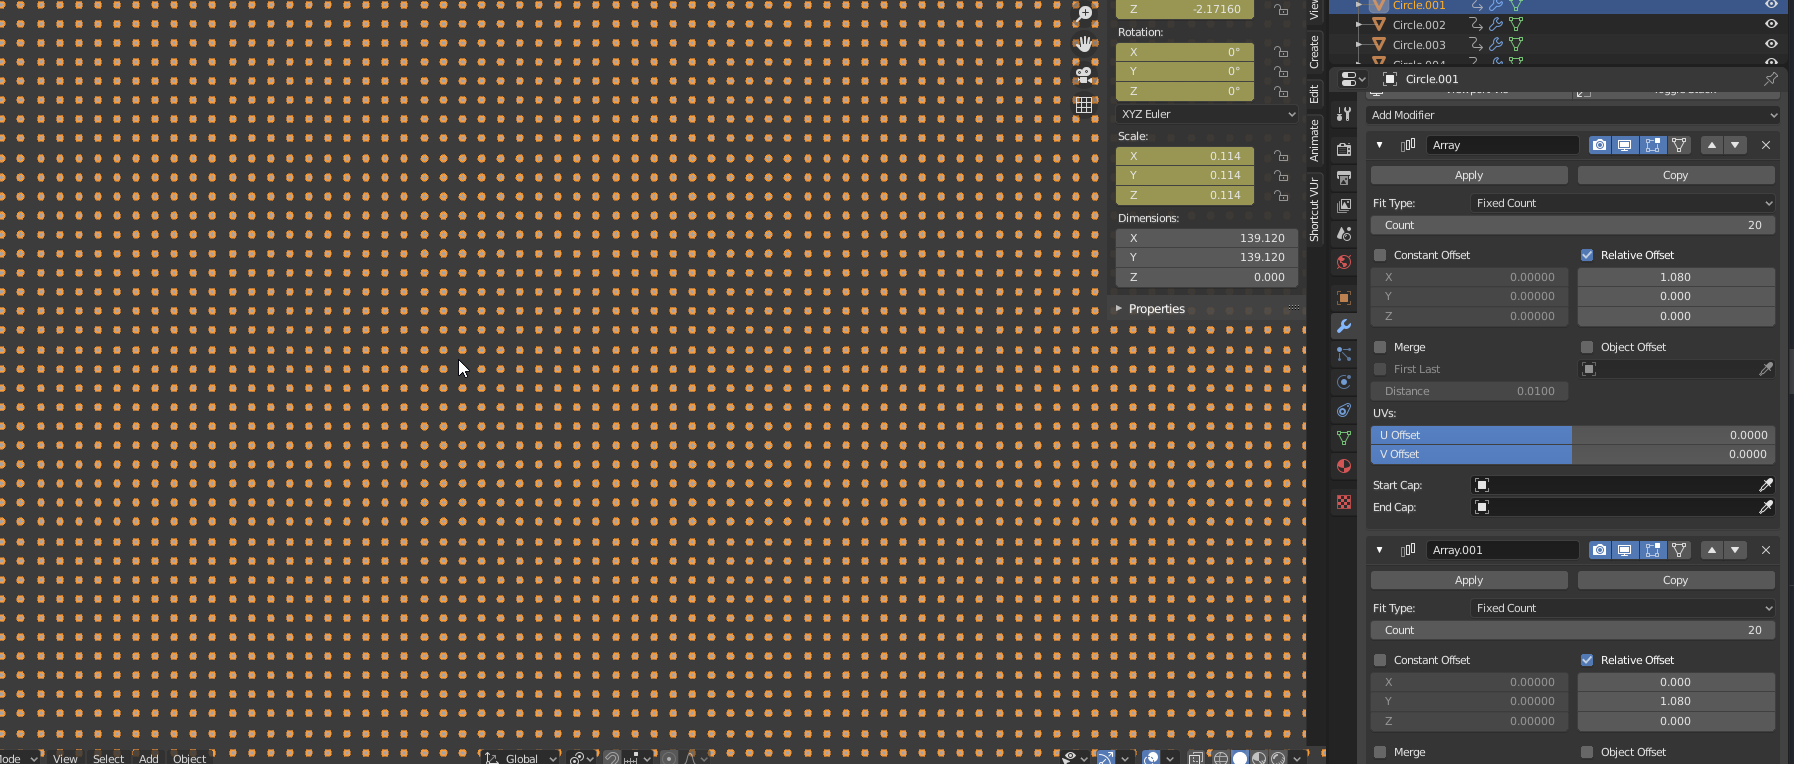 This is a grid array of circles, with two perpendicular arrays.
Nested elements are just formed by duplicating an outer ring shape and scaling it down, as many times as you want. This can’t be easily done with array modifiers, though it is possible, but in my estimation it’s not worth the hassle.
Other complex composite elements are up to your creativity to generate.
Shading
There are two major shading categories that I can think of: 1. Random colour variation 2. Shadow
The shading graph is shown here:
The random colour variation really depends on your ability to pick nice colours, either analogous our otherwise equally spaced on the colour wheel (eg. complementary, triadic), but I’m not going to focus on colour theory today. There are plenty of nice tutorials concerning that online.
The shadow category is supposed to emulate a primary colour, something bright and saturated, and a shadow colour, similar to the background in hue but with varying value/brightness. I suggest you sample the background colour and then just darken it for a shadow.
Conclusion
Thank you for reading this tutorial, and I hope you got something useful out of this. Of course, nothing moves yet, but that’s for next time! I’ll release a devlog next week, but in two weeks I’ll have the next part of this tutorial out.
Update: Here’s a link to part 2.
Until then, I suggest you work on creating more isotopes and molecules and develop them out of simple primitives, and also pick a good shading colour scheme. Cheers!