One of my favourite techniques in making low poly art is using colour palettes to texture models. In this Blender low poly tutorial, we’ll learn to model a low poly lollipop with the decimate modifier, UV unwrap it with Blender’s automatic UV tools, and apply a colour palette to texture it. Then, we’ll set up a background and some basic compositing effects to create this background.
Finally, I’ll show you a quick and easy trick to animate this texture to make it appear to wrap around the model.
If you’re interested in pixel art, you might find some connections to low poly, given that these two art styles are very similar, except for their dimension.
Video Tutorial
This tutorial goes over everything but animation. The animation part is at the bottom of this guide.Text Tutorial
Modelling
There’s not to modelling this “lollipop”. If you do a quick google search, you’ll find plenty of image references, but as with pixel art, one of the pillars of low poly art is exposing the essence of the form. While you could try to make a complex twisting spiral shape, this can be imitated simply enough with two nested toruses (torii?) and a slightly flattened sphere.
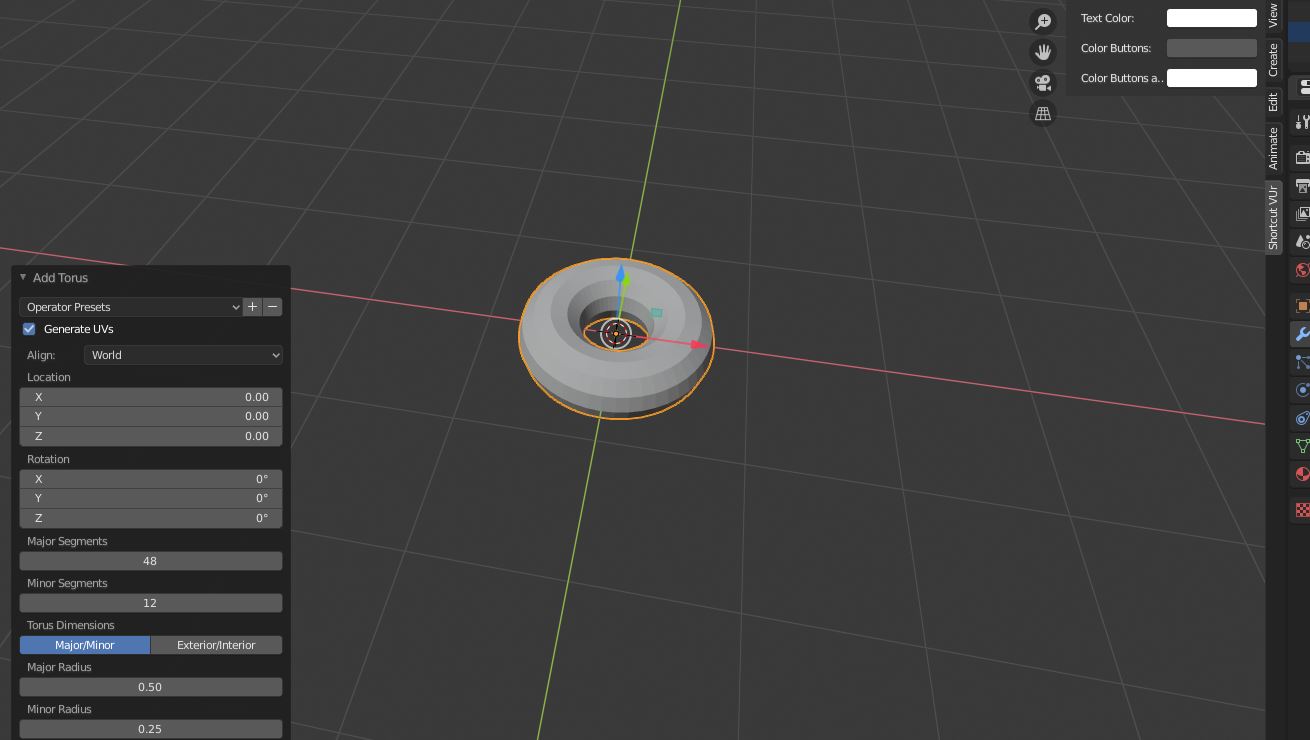
To make the torus modelling easier, we can use the settings panel when we create a torus to change the major radius for the inner torus to make it fit snugly into the outer torus, like the image below.
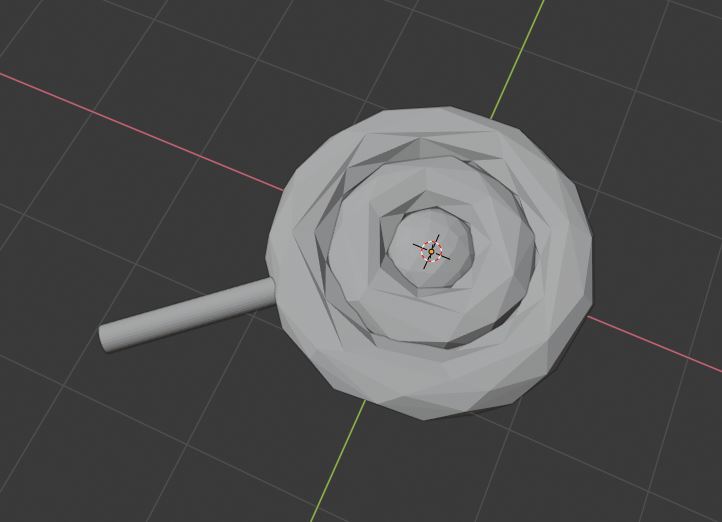
The stick is just a cylinder made thinner (scale on XY axis, then do some rotations to position it as you like). The full geometry is shown here.
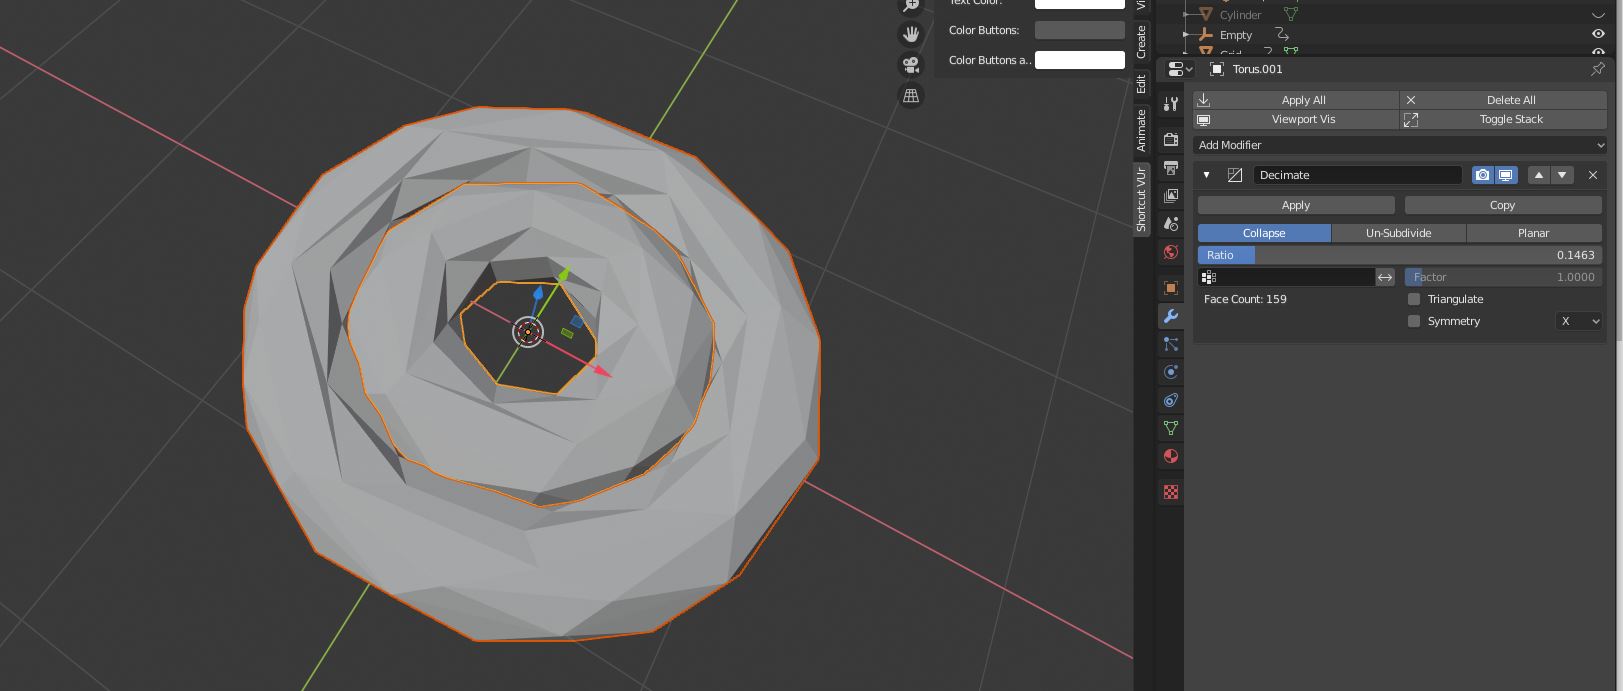
To get a low poly look, with discretely visible triangles, we can use the decimate modifier to collapse the geometry as below:
Note though, that this is something of a shortcut. Low poly emphasizes the placement of individual tris, just like pixel art emphasizes the placement of each pixel. By using this procedural technique, we lose a bit of intentionality, which fortunately doesn’t detract from this model, but is probably not a good approach to making a low poly character.
Another thing to be aware of is to make sure we have about the same density of triangles throughout the scene. You don’t want to decimate the smaller torus by 90% and the larger one by 10%. Rather, you should decimate them until they look like their individual faces are about the same size.
Shading
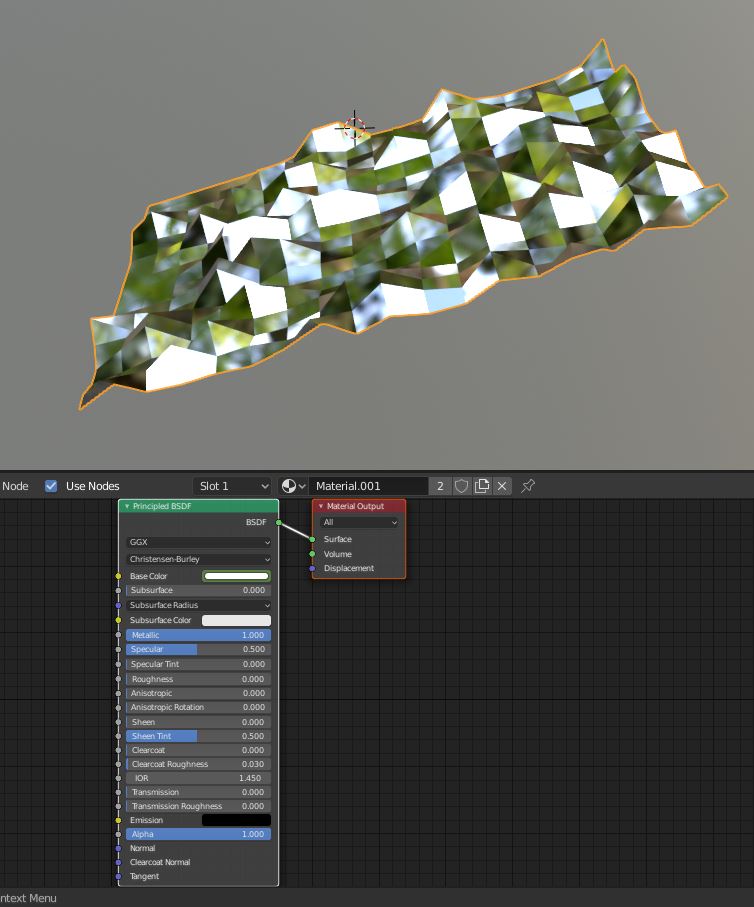
Creating the material for this model is remarkably easy, but we need to first UV unwrap it. Since we’re trying to make this as simply as possible, we’re using the built in UV tools.
Swap the view to the UV editor, and select either torus, then go into edit mode (Tab). You want to make sure the panel on the left side is set to UV Editor, NOT Image Editor as is the default. Select the icon in the bottom left corner and make sure you’ve got it set to UV editor.
Palette Choice
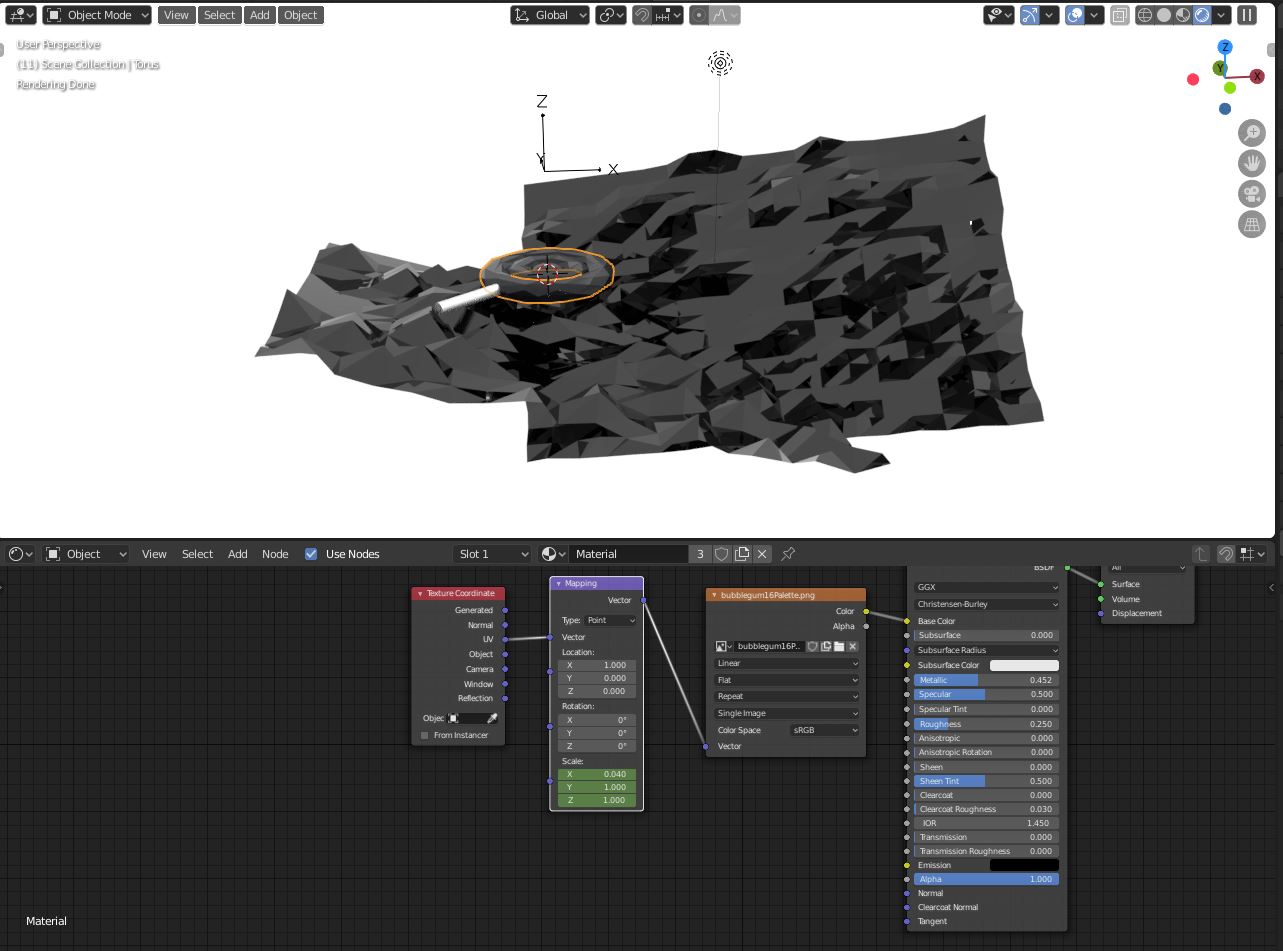
Load in your desired palette into the UV Editor panel (Centre bottom of the panel). You can find some on LOSPEC, one of the foundational pixel art sites. I used a palette called bubblegum16 but you can choose one as you like. Make sure to pick one with a smaller amount of colours, so we don’t end up with a 64 colour lollipop, which would be visually quite noisy.
UV Setup
Then, you can unwrap the torus by hitting (in the 3D viewport, edit mode) U > Cylinder Projection. Why? Because the geometry of a torus is really similar to a cylinder. They are topologically different, but a torus can be made by taking the endcaps of a cylinder and joining them.
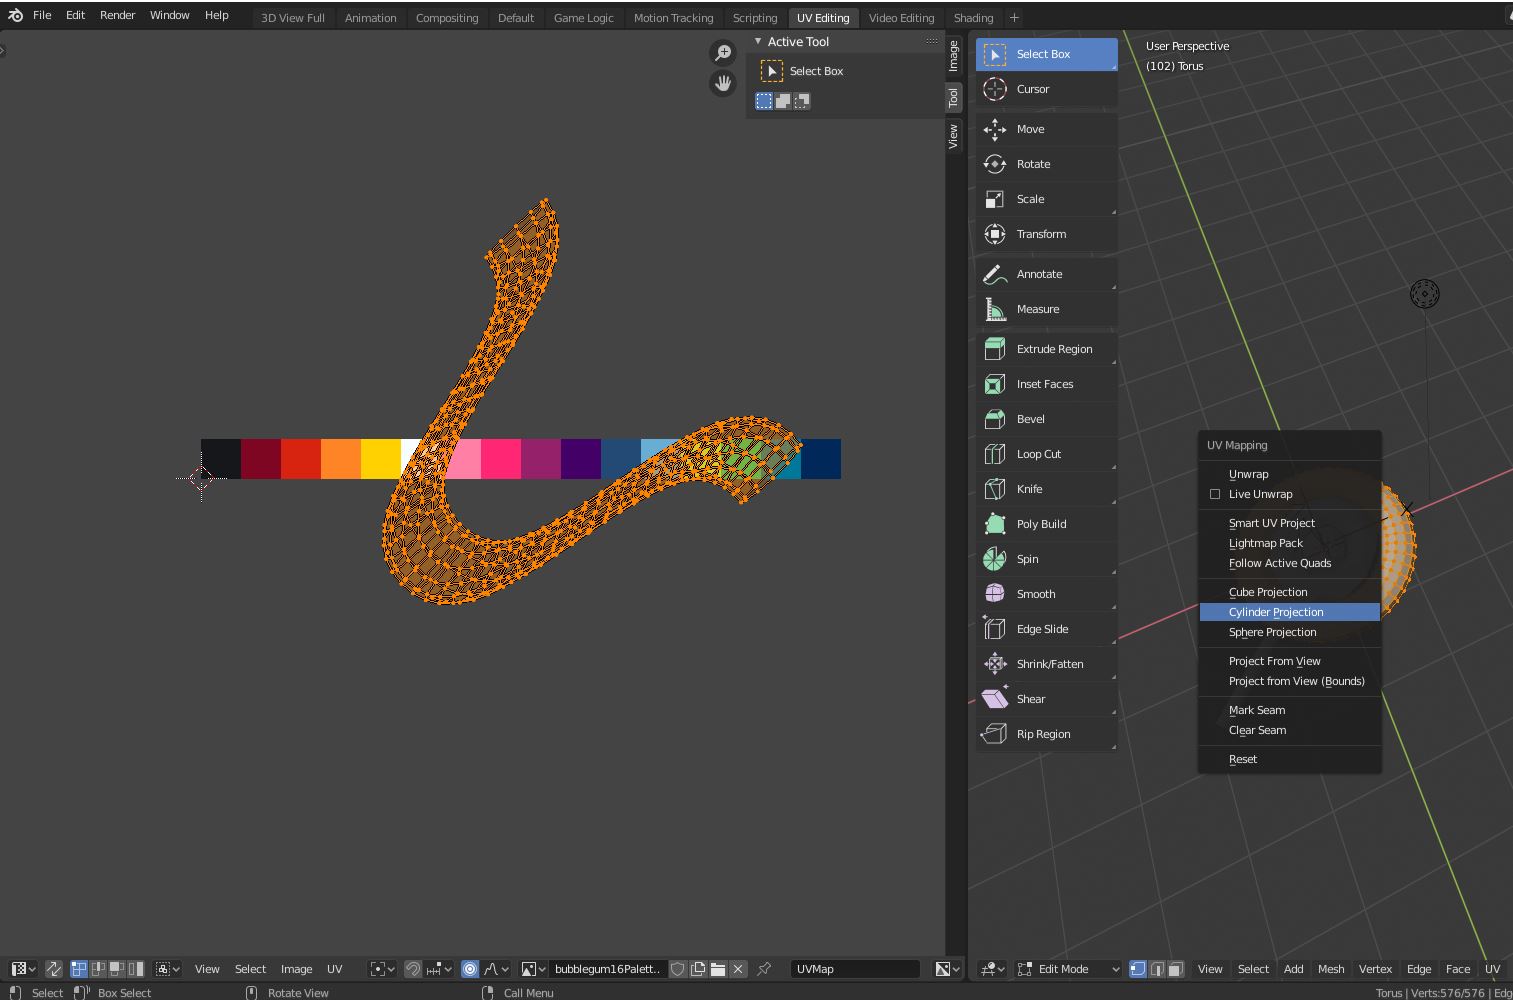
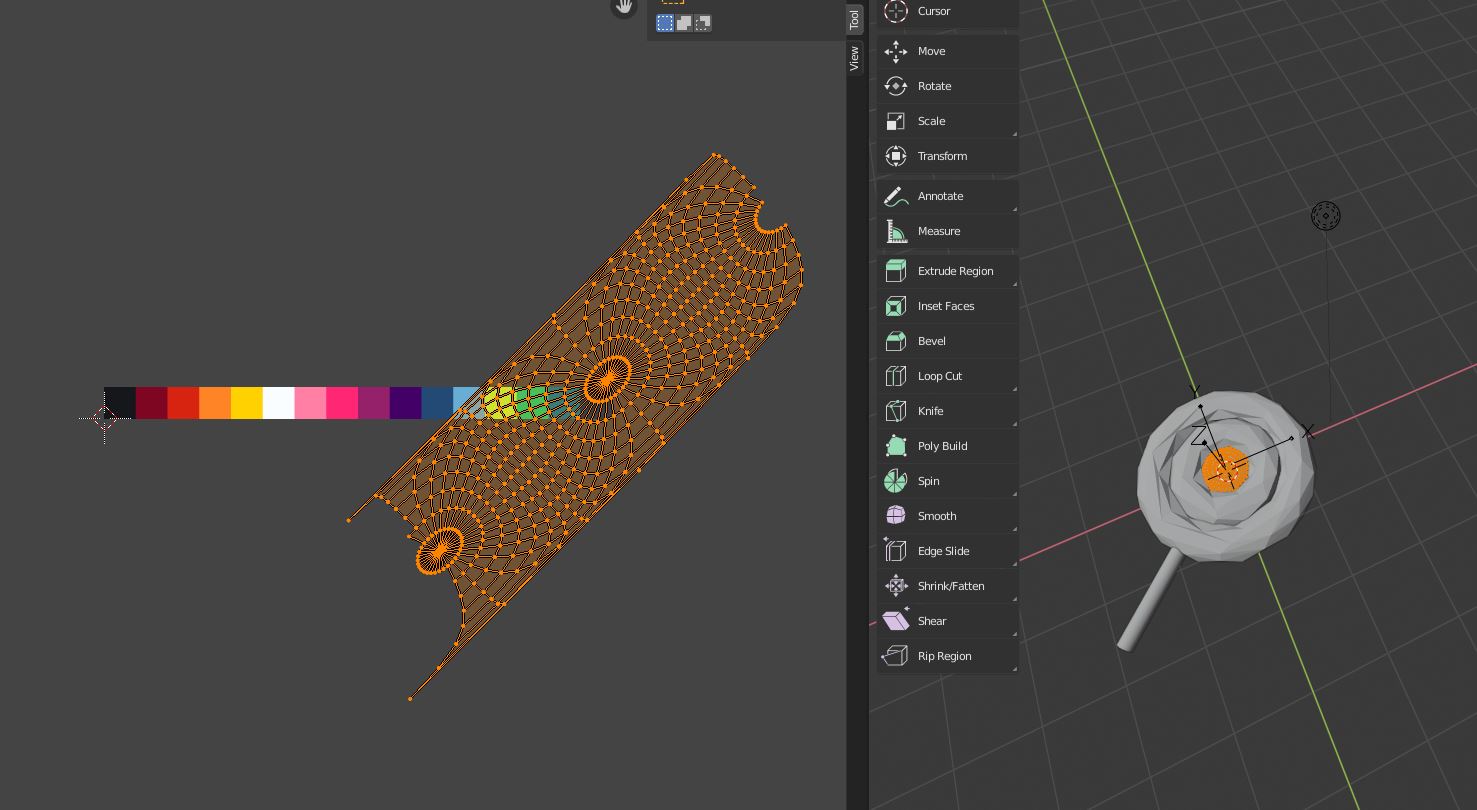
We can manipulate the projection of the torus in very complex ways, but for this tutorial, you just need to scale it and rotate it until it looks something like this. We’ll come back to it. Then, we’ll have to do the same thing to the other torus and the sphere (This we’ll unwrap with the appropriate sphere projection.)
You might notice now that the image doesn’t actually show up. This is because we haven’t applied a material yet, so let’s do that. All three objects should share a material.
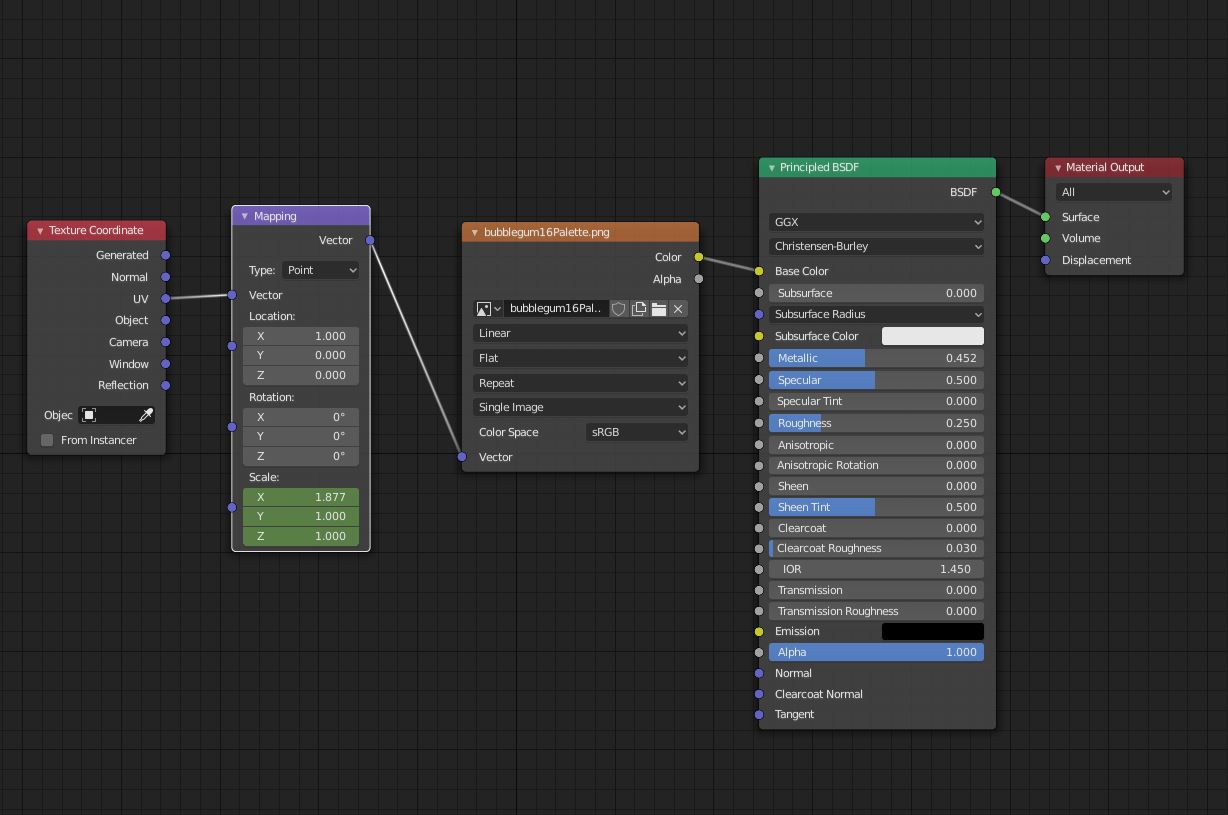
Here is the node setup. It’s very simple, and a bit glossy for that glazed-sugar look. The texture coordinate -> mapping -> image texture -> base colour setup is a very standard configuration, which lets us control how the image is projected onto the unwrapped mesh.

For a closer look:
Now, you can go back to the UV mapping tab, and adjust the UV’s, and you’ll see the projection of the stripes changing. Adjust it to your liking, though the way I did it was giving the outer ring a more warm colour, and the other segments progressively cooler colours sections on the palette.
Scene Setup
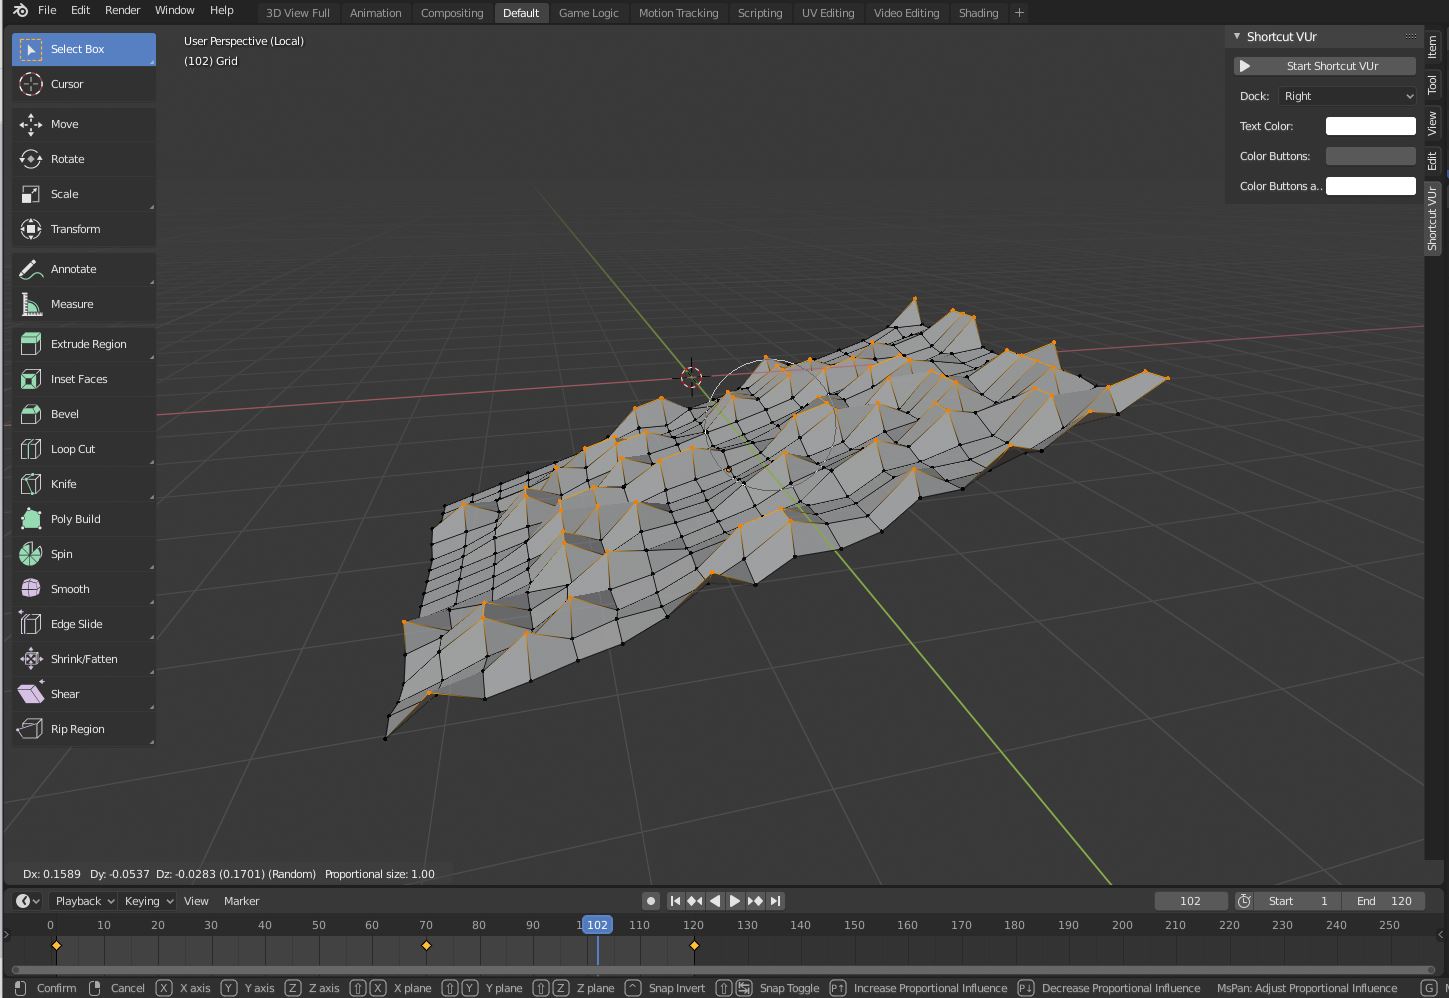
Create a Grid by Ctrl+A > Grid, and set the subdivisions to something like 20 in each direction. You want a lot of geometry, but not so much it becomes meaninglessly noisy. We can select vertices randomly, or use the very useful Select > Select Random tool (Bottom left of the modelling tab).
For a bit more randomness, we can turn on proportional editing (O) and set the falloff to random. Then, we just drag those random vertices up and watch some spikes emerge.
Shading the grid requires a perfectly reflective material, as seen here. Make sure the world is also completely white (#FFFFFFFF).
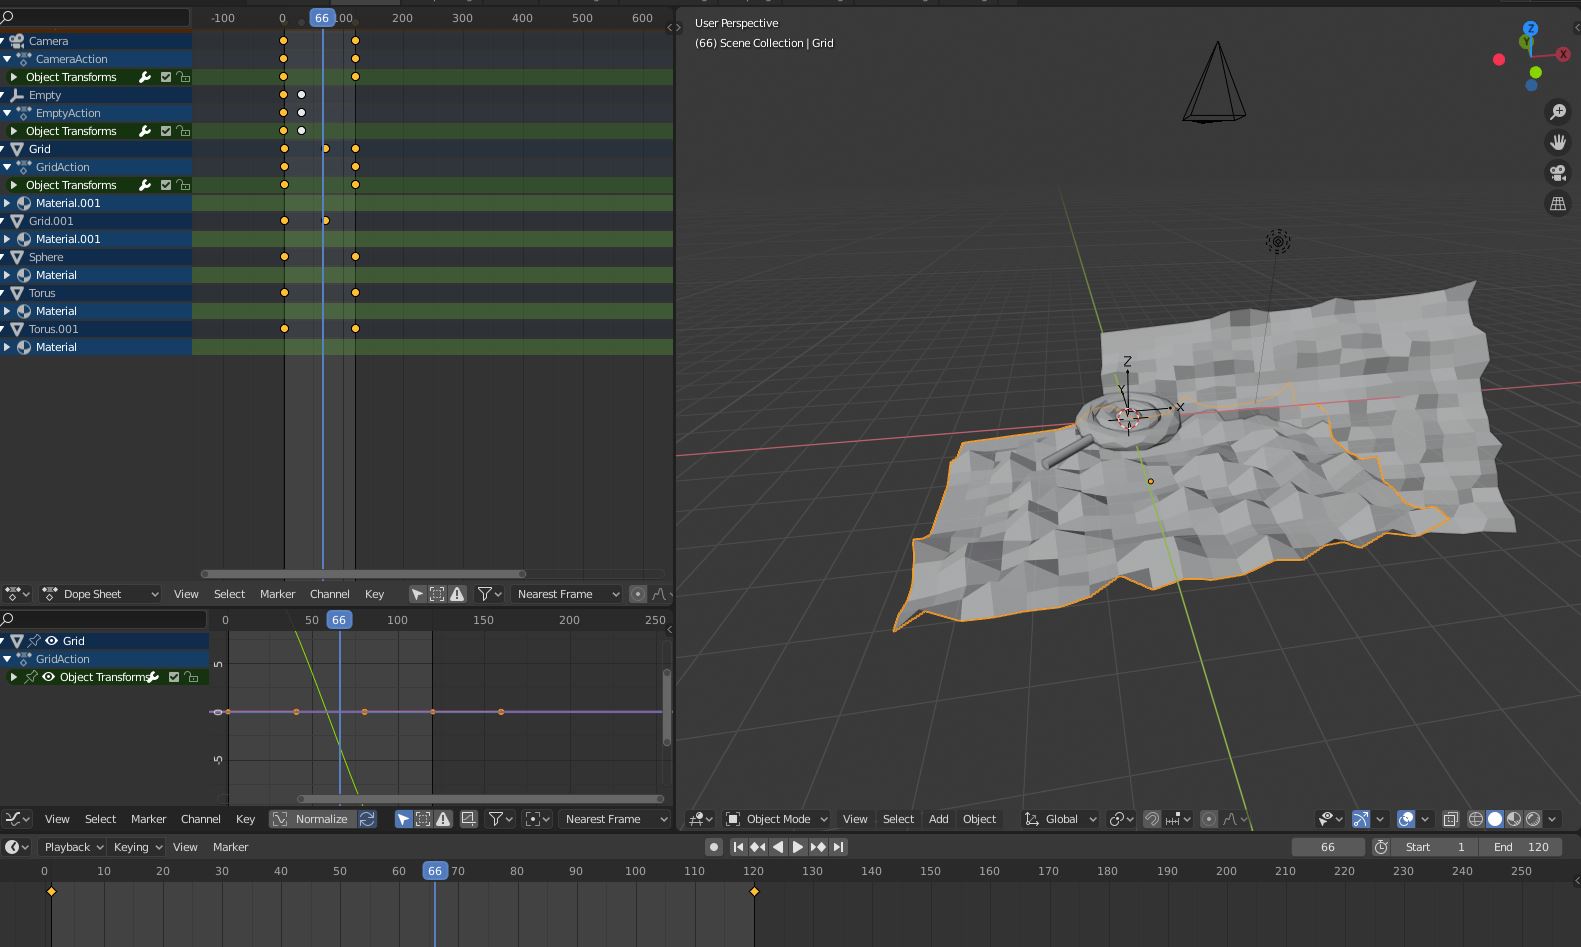
(Bonus!) Animation
A very useful feature of having UV based shading of low poly models, as opposed to individually assigned materials, is that we can animate the projection mapping. If you keyframe the X scale on the mapping node from 0 to 2, you’ll get a very interesting swirling animation as the palette fills in the shader.
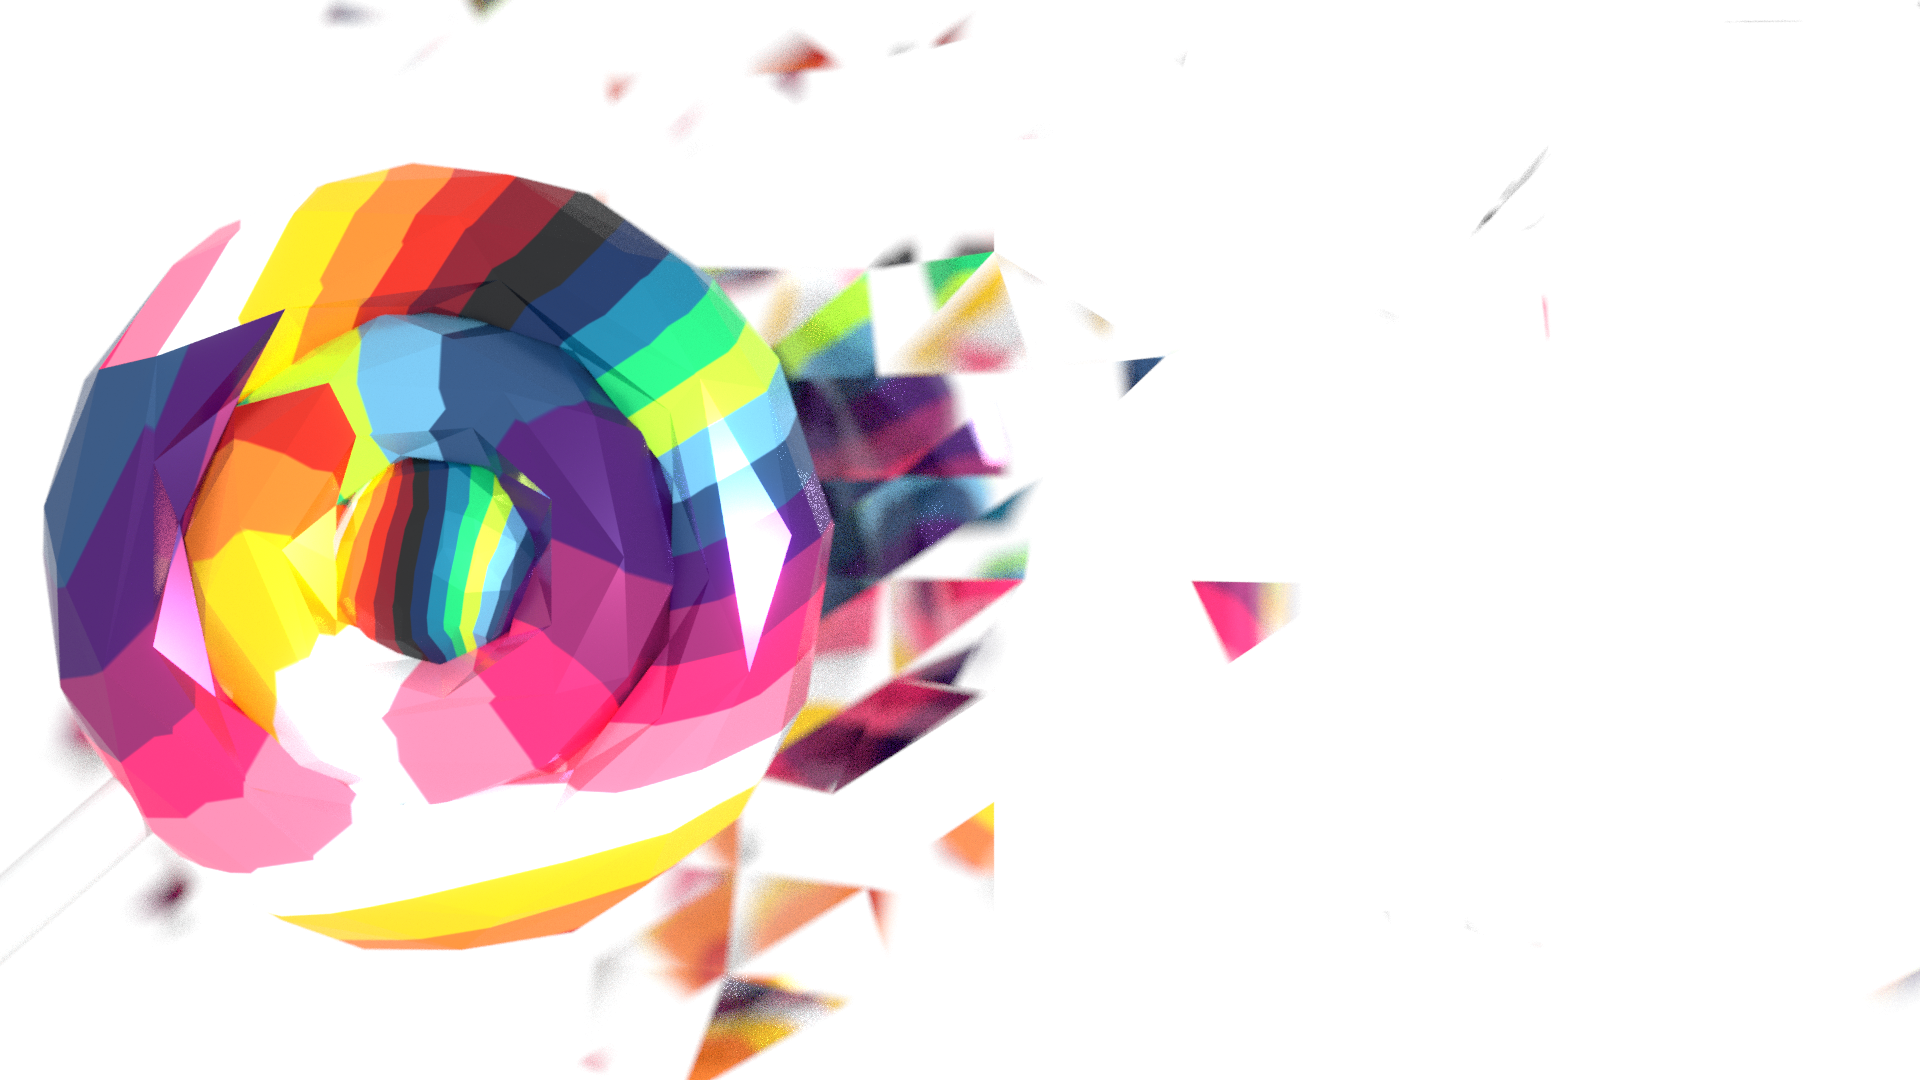
Here’s what it looks like at the start:
 And at the end:

You’ll notice the grid is animated too, both in colour (from a dark grey to a perfect white), and in orientation, rotating a little bit.
Conclusion
I hope that you’ve learned how effectively palettes can be used in texturing your low poly art. It doesn’t require much setup, and we can simply create very complex looking materials with a single colour palette, with stunning animations requiring only a few keyframes. Additionally, I hope that, for those pixel artists among you, that there are many similarities between pixel and low poly art. We can draw techniques from one to apply to the other, and this can lead you to surprising effects.
Have fun exploring this effect!