I’ve always found Blender’s physics to be a bit unreliable, but it certainly has enormous potential, as it has a ridiculous amount of features made to simulate pretty much any mechanical device you can imagine. I’ve never really made a tutorial on Blender’s physics (except one about animated cyberpunk-esque waves), so let’s build a trebuchet today.
Why a trebuchet? Because it’s clearly the superior siege engine. What else can toss a 90 kilogram projectile 300 metres?
Anyways, the trebuchet also provides a very simple mechanical model for us to build and replicate with Blender, and we’ll be going over a few essential topics in this tutorial:
- Rigidbody Physics (Making things move with physics!)
- Rigidbody Constraints (Pinning together rigidbodies in interesting ways!)
- Cloth - Rigidbody Dynamics (How do we attach a sling to the arm of the trebuchet?)
Video Tutorial
As usual, the video tutorial version of this is recommended if you’re not able to follow the rough outline of what I’m going to provide on this text summary. If you’re experienced with Blender and can fill in the gaps, I suggest you read below to follow along at your own pace.
Text Tutorial
Modelling
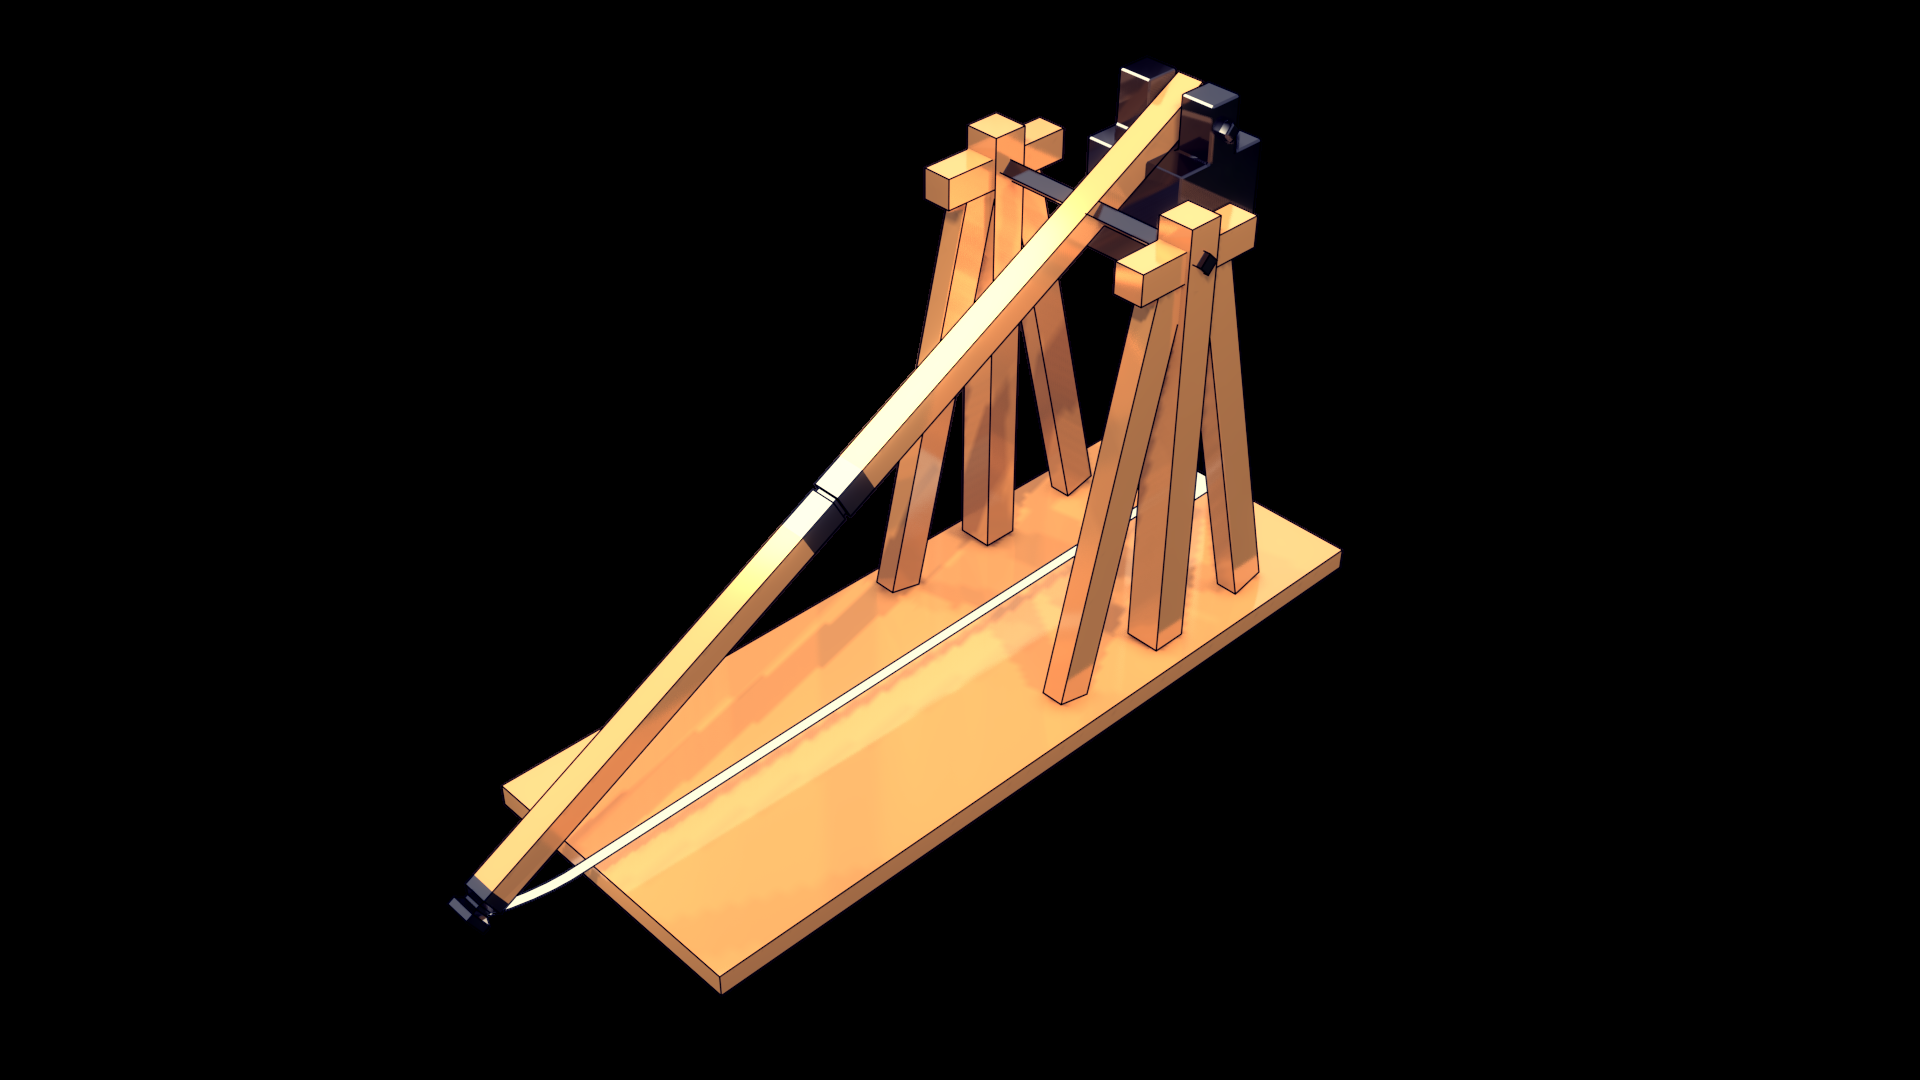
I’m going to go for a simple, prismatic style here. You could call this low-poly, though this is to more of a pragmatic point than a stylistic one. The focus of this tutorial will be on the physics simulation, and not on modelling.
So, I’ll make the whole thing, less the sling, out of extended cubes.
Here’s a look at the side, front, and top views. Since we’re just going to use some scaled cubes, this should be easy.
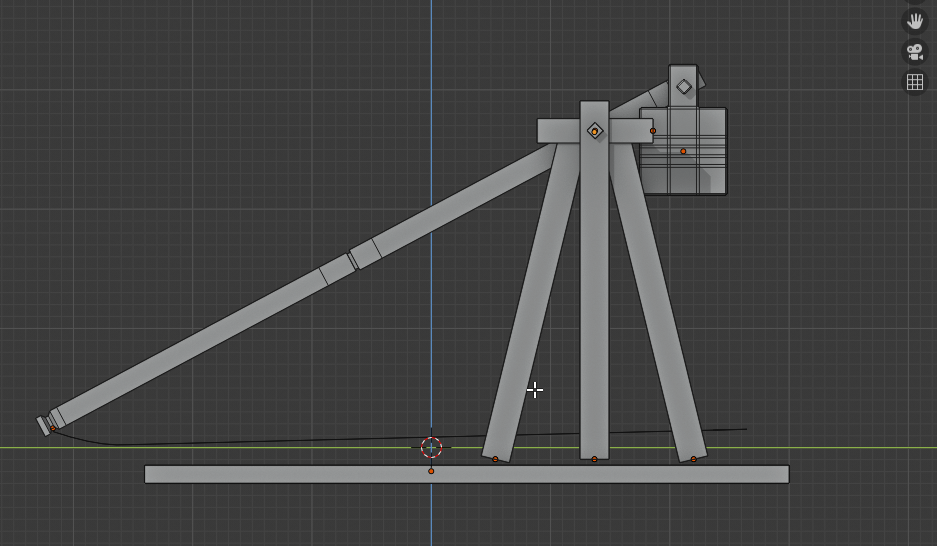
Side View
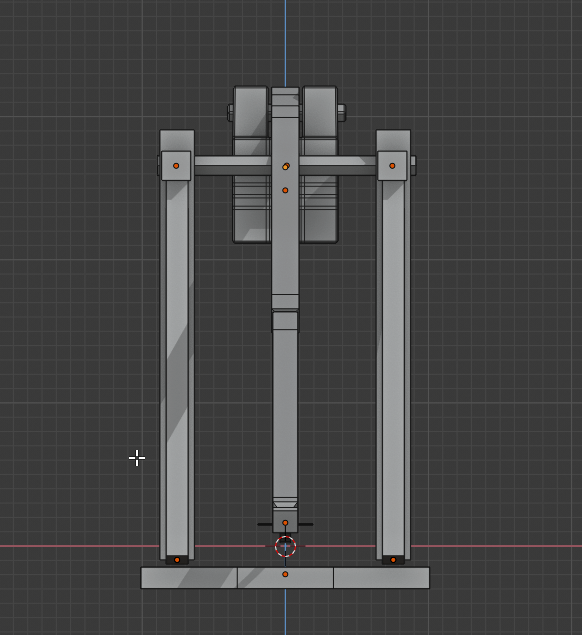
Front View
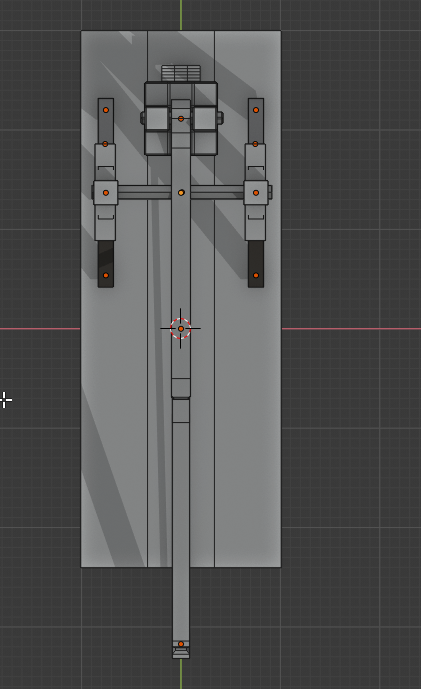
Top View
Here, you can see that the origin for the trebuchet’s arm is at the pin position, where it connects to the overall structure.
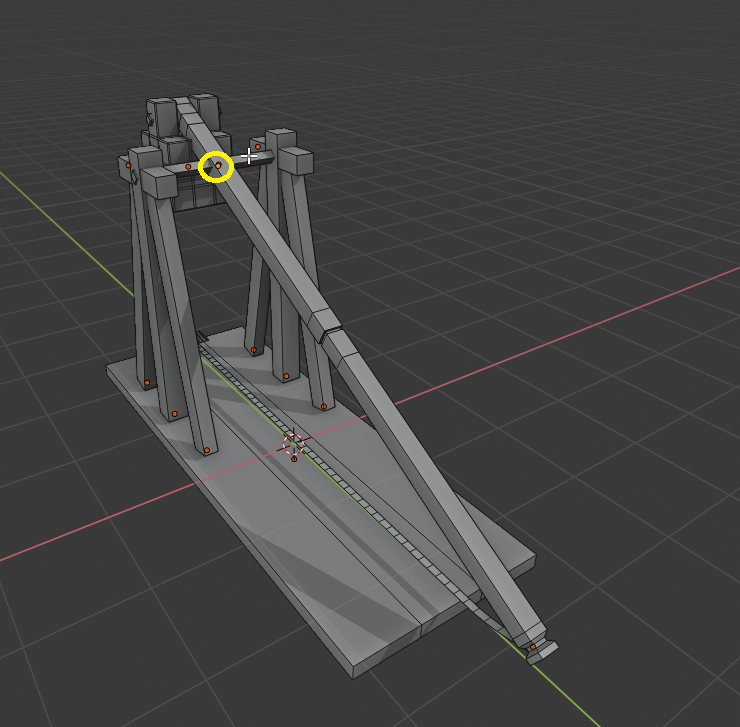
One important thing to note is that I have the pins (Elongated prisms rotated 45 degrees on the long axis) situated in these locations. I suggest that when you model the counterweight (the black cube), you join the hinge with it so they’re one object, as the counterweight will be moving and you want the hinge to move with it. I don’t think parenting them will work with the physics we’re going to apply so simply join them with CTRL+J.

Finally, for the cloth sling part, we have this geometry. This is the simplest “rope” that you can make, using a scaled plane that has been loop cut about 50 times (CTRL+R) and extended at the end. Note that along the rope, I don’t have any edge loops running across the long axis, so that this 2d “rope” doesn’t “fold” and distort weirdly. We generally only want it to bend and curl perpendicular to the major axis.

Physics
Adding Rigidbodies
Now for the fun part - Adding physics.
We need to add a rigidbody component to several components here: 1. The throwing arm 2. The counterweight 3. The pin connecting the throwing arm and counterweight
Do it like this:

Make sure the pin has its Rigidbody Type set to Passive as it shouldn’t be moving. It needs a rigidbody component so we can use it as a Hinge joint when we bind these parts together.
Set the mass of the counterweight to be 50 and the mass of the throwing arm to be 5. I find a 10:1 ratio reasonable for the animation, though you may want to look up how it’s actually done in real life. I’d assume 100:1 or something would be more apt for a real trebuchet, but that will sort-of break Blender’s physics so don’t do it!
If you were to check out the animation (Make sure to start playing at frame 1), you’ll see everything sort of fall apart. We need to start adding pins and joints!
Rigidbody Constraints (Hinges)
If you’ve opened a door before, you can imagine what hinges are. They only allow rotation around one axis, and prevent translation entirely. They’re one of the fundamental types of joints, and provide one degree of freedom.
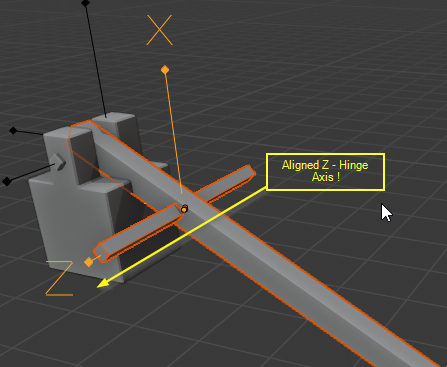
By default, the rotation axis is the Z axis for Blender’s physics, and we will use that.
Create an empty > Arrows at each position you want a hinge and rotate it so that the Z axis is aligned with the hinge.
Then, add a Rigidbody Constraint > Hinge Type to the empty, and make sure that Disable Collisions is ON and the First / Second objects are set to the pin and the throwing arm. The order of these doesn’t seem to matter in my experience, but for the record, my First is set to the pin and my Second is set to the throwing arm.
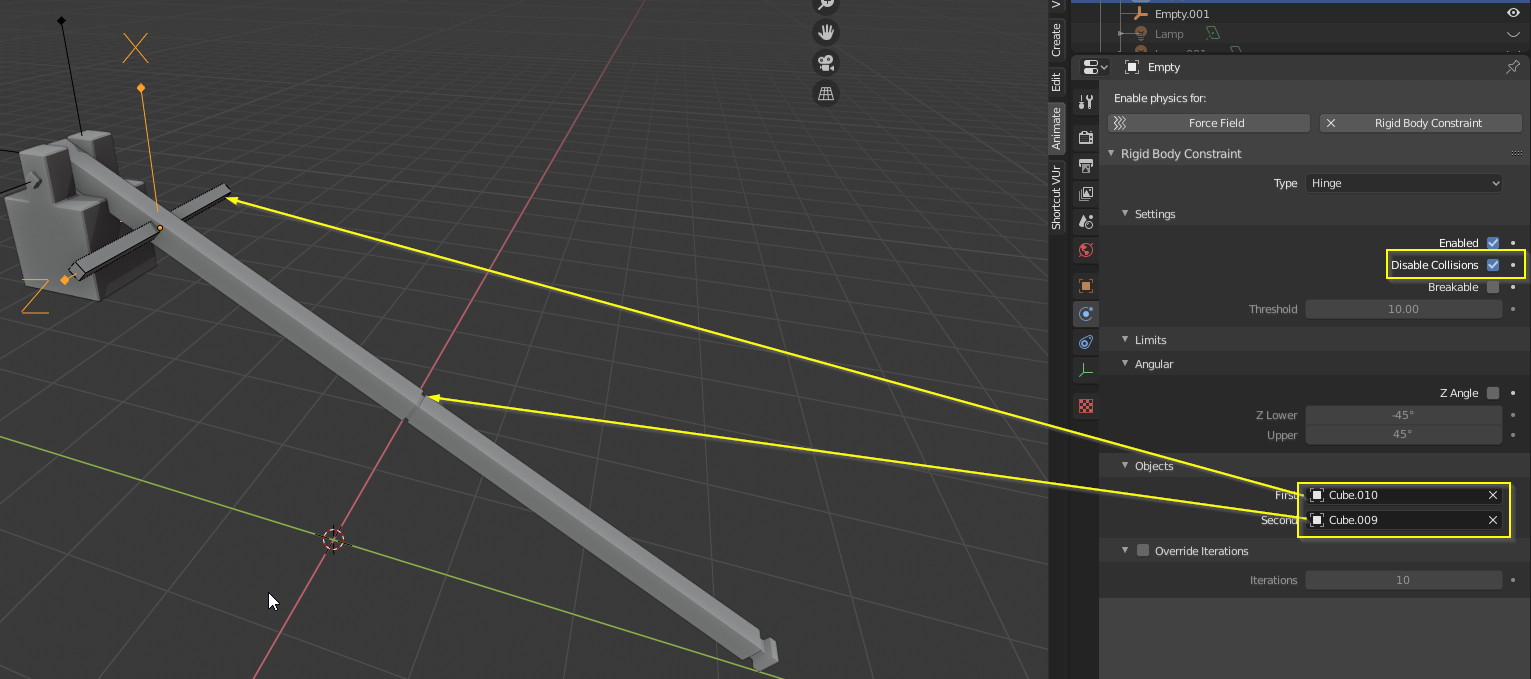
Do the same with the Counterweight and Throwing Arm now: Create another empty aligned with the hinge axis, give it a rigidbody constraint, and set the objects as the throwing arm as First and the Counterweight as Second.
Now, you can play the animation from the beginning and it should work as expected. You may find a bit of axis wobble, but that’s okay as it’ll be going quite too fast too see.
Cloth Physics (Attaching the Sling)
Congratulations, you’ve made a weird vertical pendulum, or a battering ram meant to bash in things at a 45 degree angle to the ground. Let’s add the sling now.
First, select the end face of the cloth, move it close to the end of the throwing arm and create a new vertex group holding it called “pin” or something to that effect.
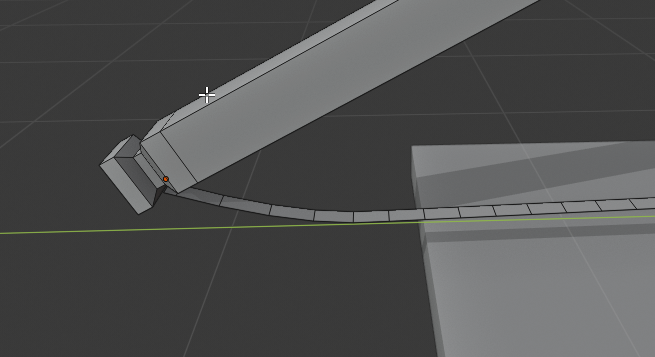
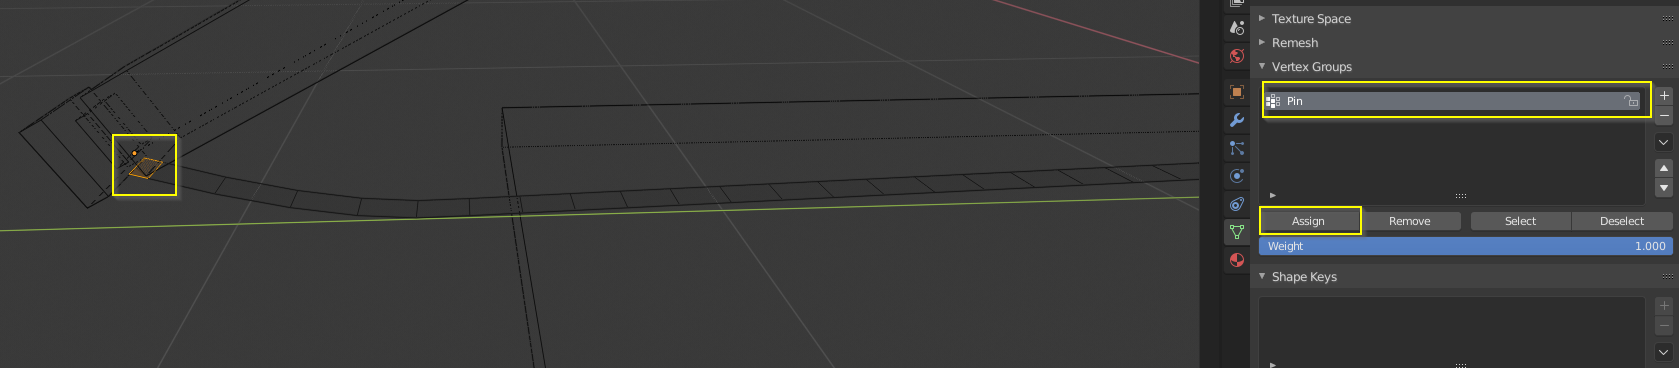
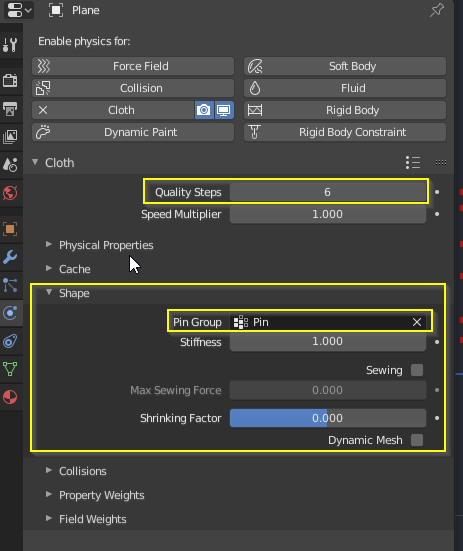
Then, apply a cloth component in the Physics tab, and assign the Shape> Pin Group. Also, you could increase the quality for a smoother animation.
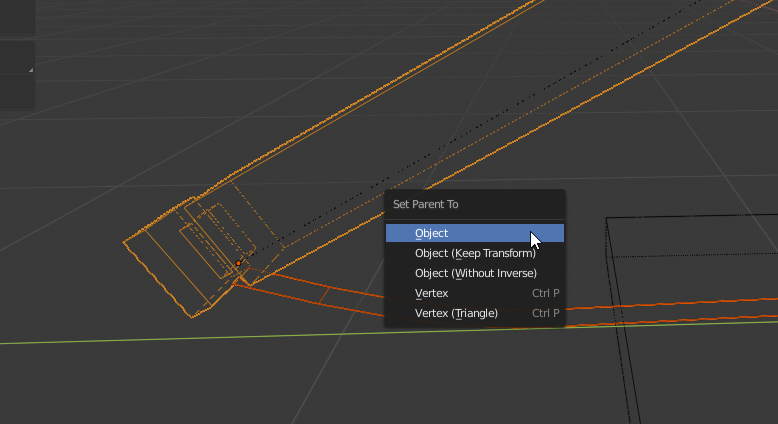
Finally, parent the cloth and the throwing arm together, with the throwing arm as the active object. Now it should move along with your throwing arm like a whip.
Finishing Touches
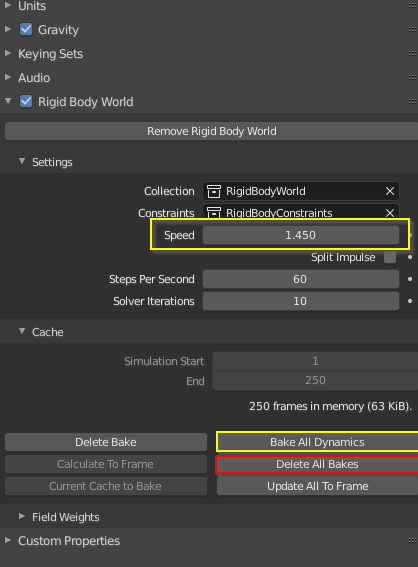
Now, you can stylize this as you wish, and I suggest you render this with EEVEE. Here are some tips: - Add a ground plane - Animate the camera position to zoom in and out - Add Freestyle for a nice outline, though you should move the rope to a different layer (collection) and exclude it from the Freestyle highlighting - If the simulation speed seems too slow, increase the rigidbody world speed to something like 1.5 or 2. - Create some simple materials, like a brown diffuse shader for the wood and reflective shader for the hinge and counterweights. - Make the rope stand out - I gave it a white emission shader
To render the animation, you must first bake (Bake All Dynamics) the rigidbody simulation otherwise it will not show up. Note that to change the physics after baking, you must hit the Delete All Bakes to remove the bake and then rebake the dynamics. This took about a second on my PC, and it shouldn’t take too long on yours as this is really a very simple simulation.
Conclusion
Do you want to see more of these physics tutorials? Leave a comment or send me a message! I hope you enjoyed this tutorial and learned a bit more about using Blender’s super awesome physics system!